
How To Fix An Uncomfortable Backpack: A Troubleshooting Guide
If your backpack hurts, keep reading…
We’ve all been there. You’re a few miles in when your backpack begins to hurt. You start scrunching your shoulders, stretching your neck, and constantly tightening your belt. Some may chalk it up to “well, that’s backpacking,” while those who know better immediately begin troubleshooting because when done right, backpacking shouldn’t be uncomfortable. If something hurts, we fix it.
If this sounds like you or if you think your backpack sucks, don’t worry! This will be your official guide to troubleshooting an uncomfortable backpack. I’ll cover everything from how a backpack works to proper fit, packing techniques, and tips that can make a world of difference while on the trail.
Contents
Why Your Backpack Sucks
Anatomy of a Backpack
Backpack Suspension and Sizing
How To Pack Your Backpack
How To Wear Your Backpack
More Troubleshooting Steps For An Uncomfortable Backpack
Real Life Examples
Final Thoughts
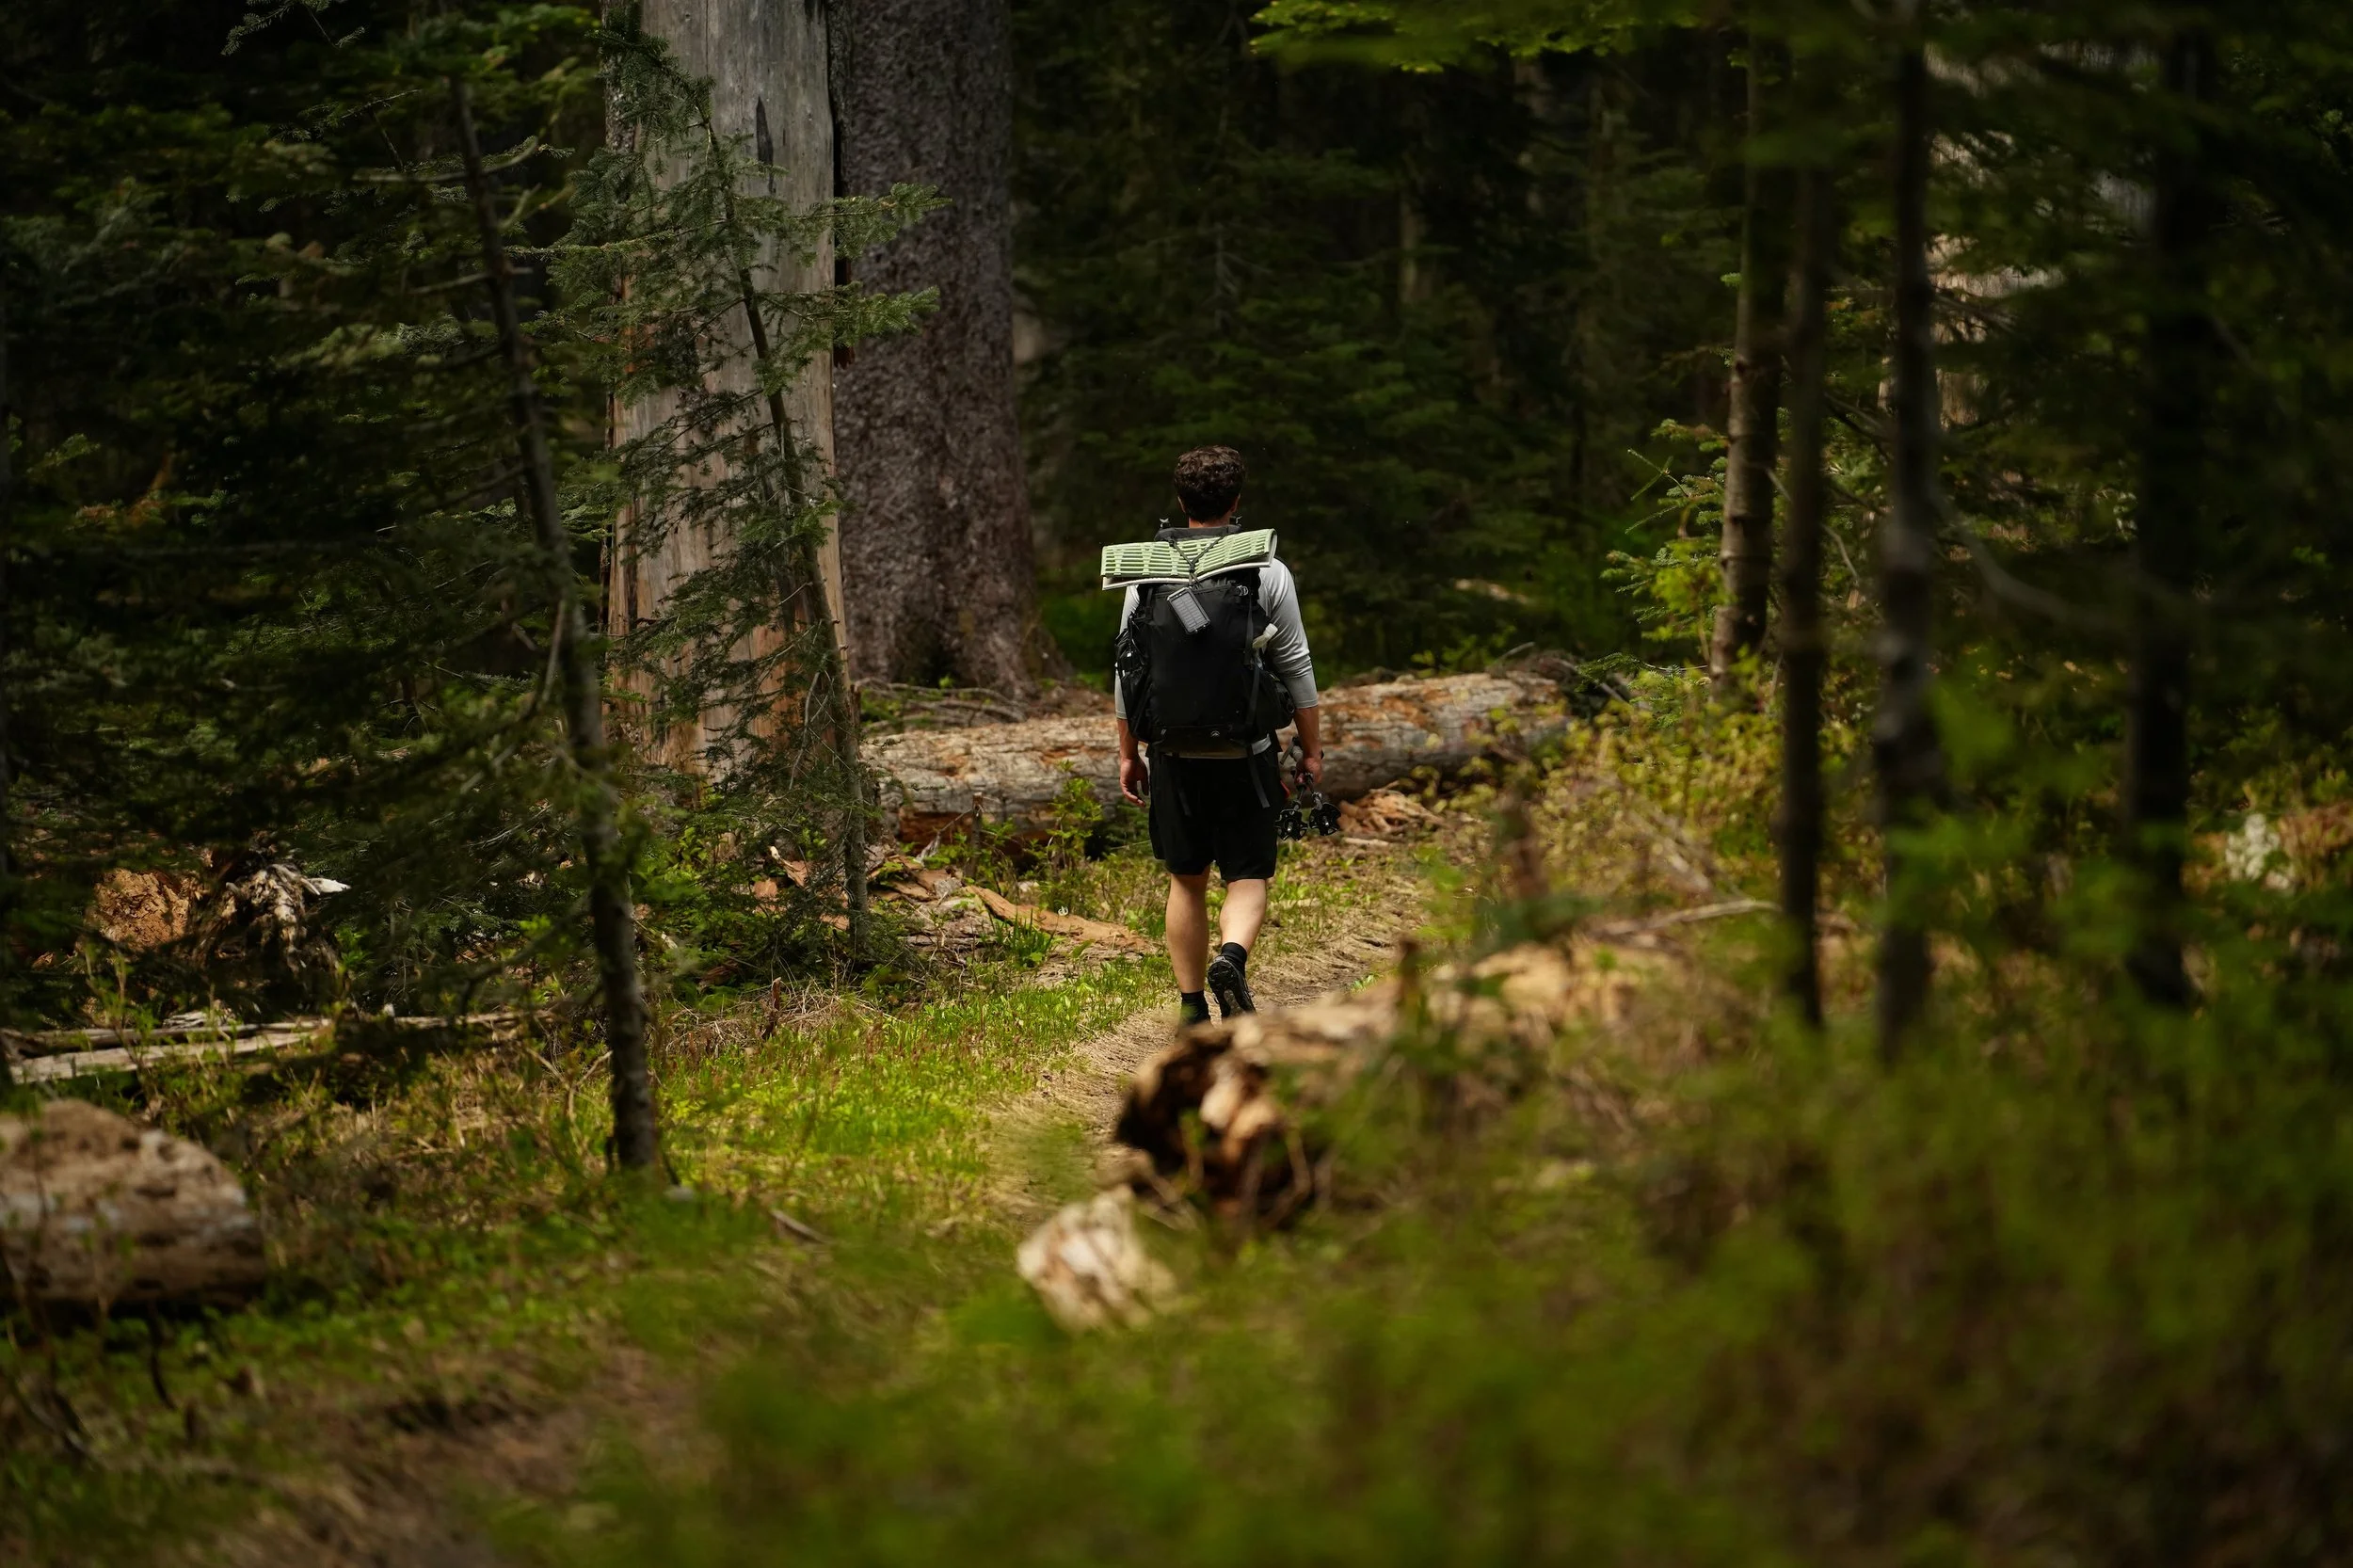
A well-packed backpack makes for a great time on the trail.
Why Your Backpack Sucks
You might be thinking maybe your backpack is the problem, but it’s not (more than likely). Sure, some backpacks do have design flaws, but in the vast majority of situations, any discomfort is a direct result of user error. In my experience, you’re probably one of the following;
Overloading the frame
All backpacks have a maximum load they’re designed to carry. Go beyond that, and your fame will begin to fail and even break, making it work against you rather than for you.
Poor packing technique and Improper Weight Distribution
How you pack your gear is extremely important and can either make your pack feel comfortable or horrible while wearing it. Placing heavy objects in the wrong location will lead to sore muscles and many aches and pains because the weight of the load is not evenly distributed.
Improper fit/sizing
Wearing a pack with a waist-belt or shoulder harness that doesn’t fit your body will not allow the pack to function how it was intended. Too big or too small, nothing will work as it should.
Improper use of key pack feature
If you don’t know what’s what and how it works on your pack, then more than likely, it’s not working the right way. Not engaging load lifters, not securing everything down tight, and not wearing your pack the right way all lead to pain and suffering on the trail.
Doing any of these means you’re not using your pack the right way, and any of them on their own will make for a rough time on the trail. Lucky for you, we can fix that! I've helped more people than I can count go from “Backpacking sucks!” to “Wow…this is way better!”
And by the way, you’re not alone here. I know all too well what it’s like to think backpacking sucks. For a long time, I was of the mindset that when you strap on a backpack, it will be uncomfortable, painful, and straight-up miserable at times. But it doesn’t have to be if you know what is what, how it works, and how to fix it.
Consider the rest of this post your re-education on how a backpack works. We’ll start with the building blocks of backpacks and work our way to packing and wearing it.
The Anatomy of a Backpack
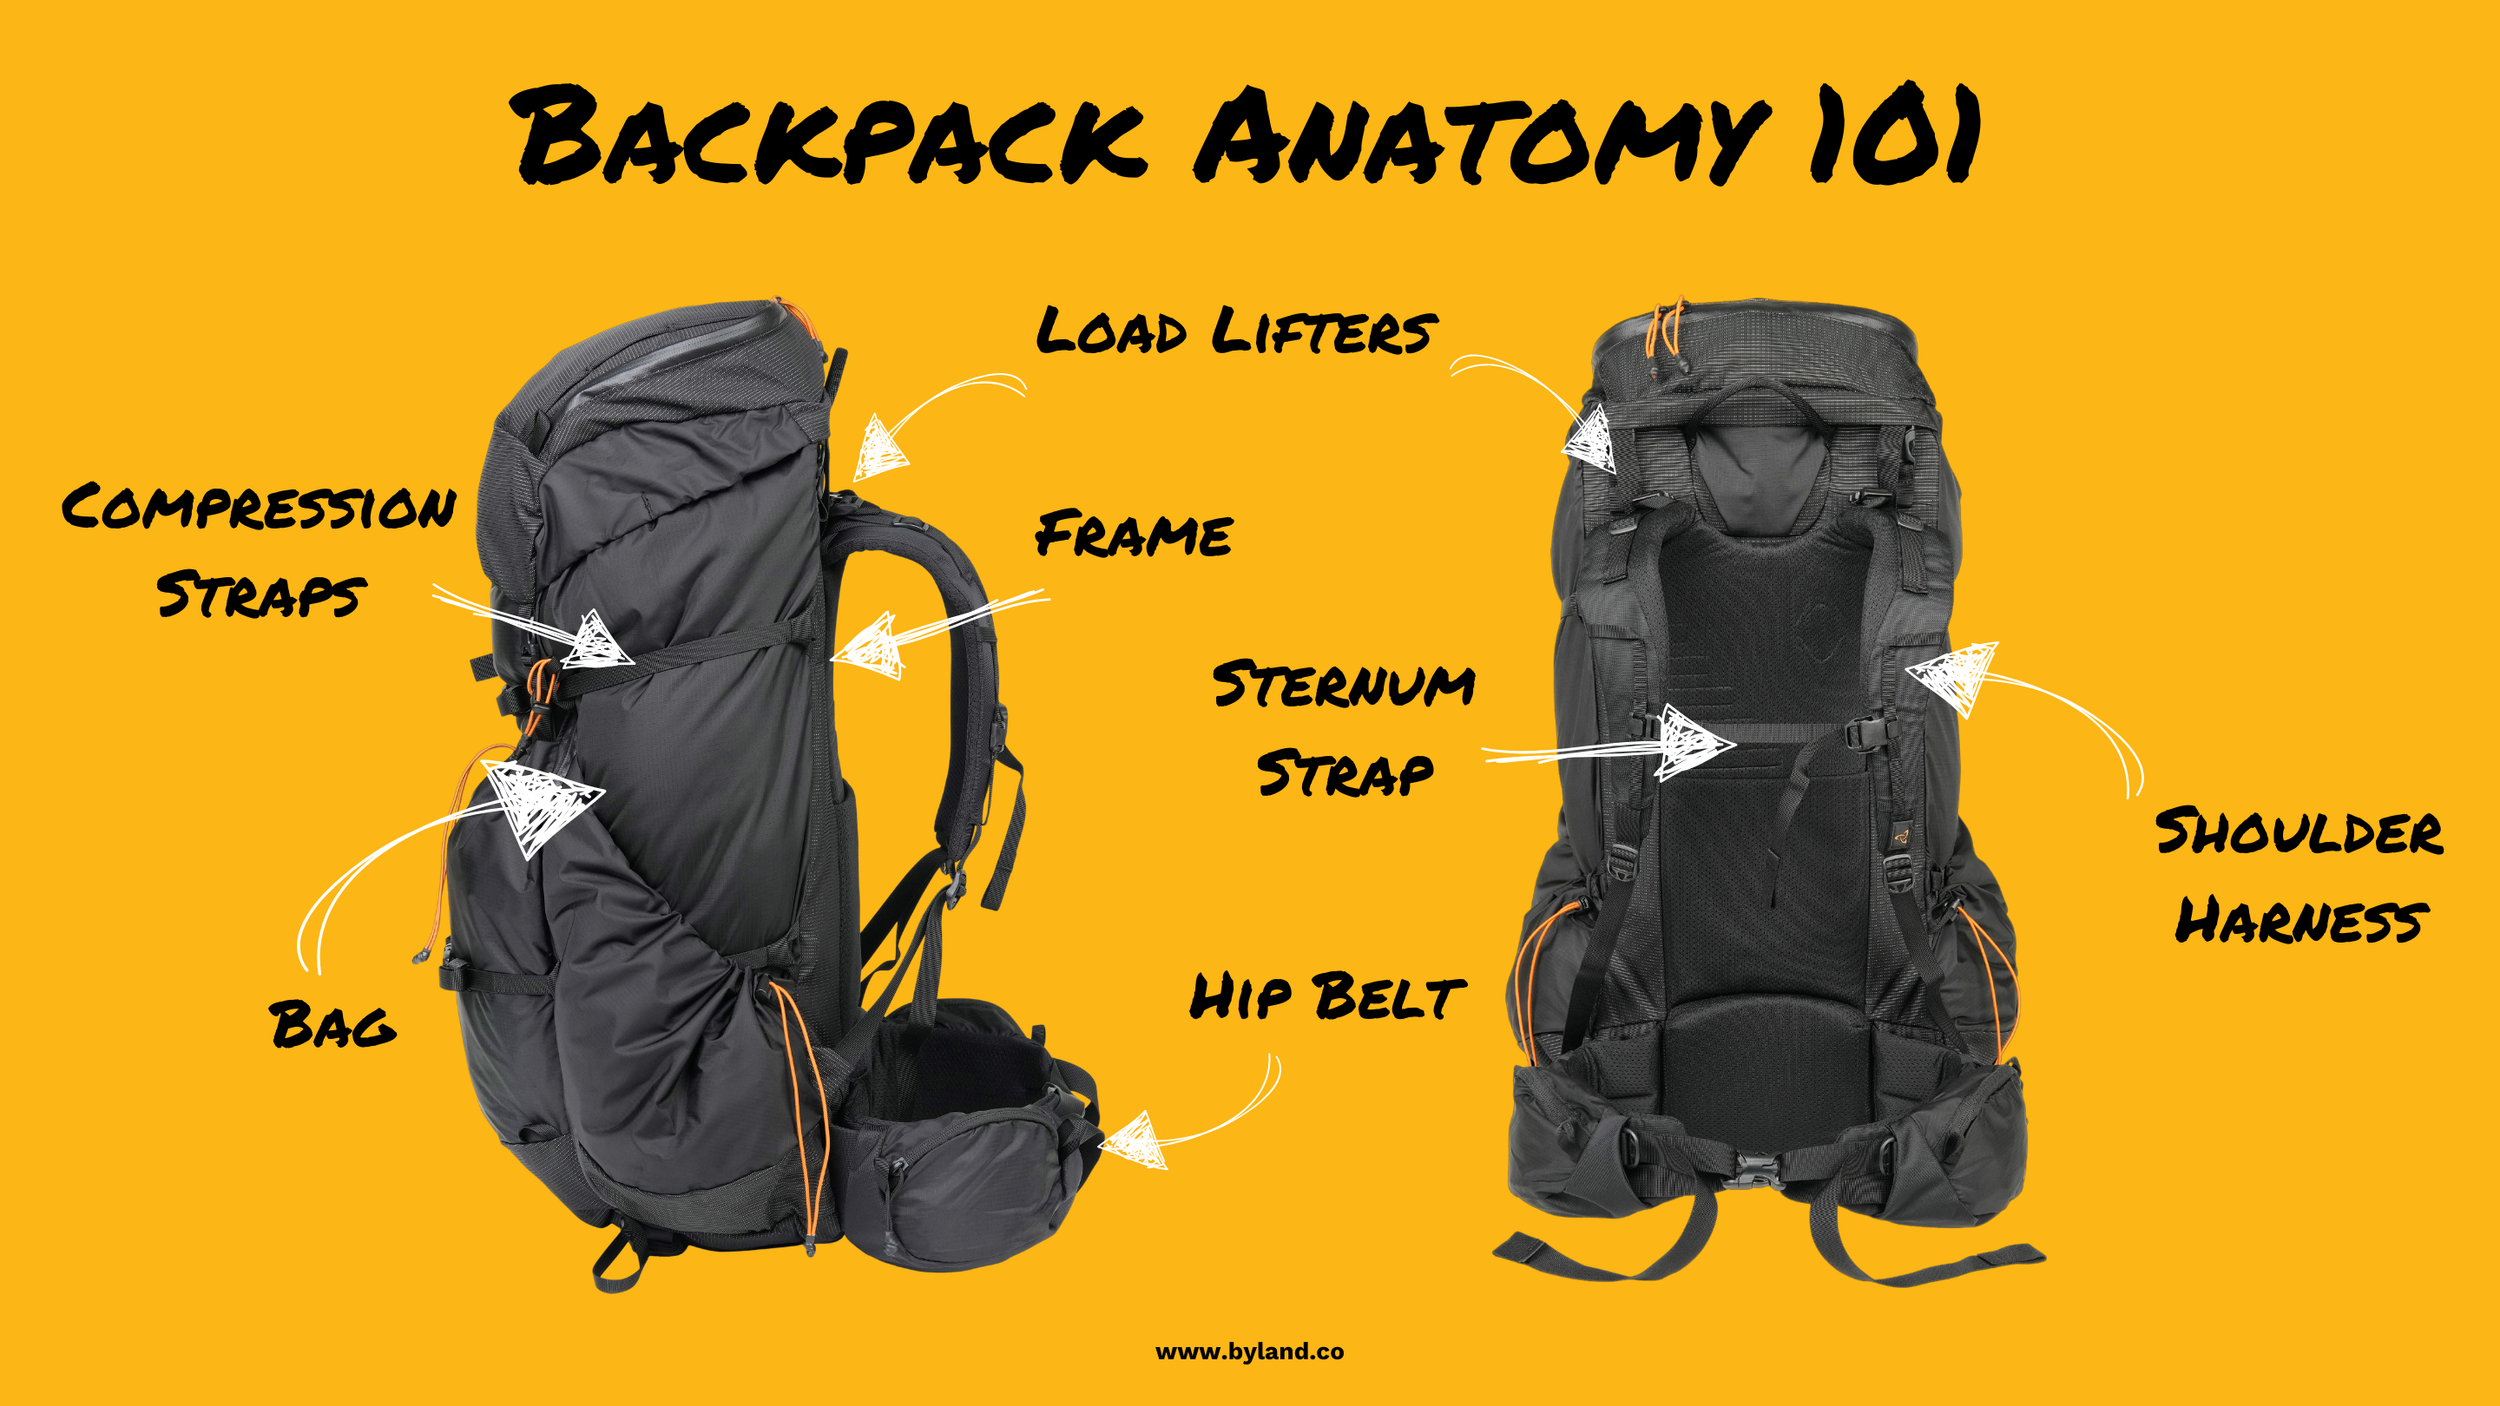
Before we get into troubleshooting your uncomfortable backpack, let’s make sure you know what each part is and how it works so you know what you’re doing.
Pack Bag: The bag of your pack is responsible for protecting your gear from the elements and the trail itself. There are a million designs based on the type of backpacking you’re doing or what level of access you need. Find one that works for you based on what you’re doing and how you like to access your gear. I personally prefer a simple pack with one main body and a roll-top closure.
Pack Frame: The frame of your backpack is responsible for providing structure and support for the items you’re putting into the bag. Depending on how rigid the frame is, it will determine how much weight it can carry. The more rigid, the more weight it can usually bear if it has a properly designed hip belt to go with it. Each pack maker should provide a suggested load-hauling limitation based on the overall design of their product. Do NOT go beyond this load rating.
Hip Belt: The hip belt is responsible for transferring the weight of the pack to your body and securing it there. Done correctly, you should be able to loosen the shoulder harness completely and have it stay in place. That, my friend, is the sign of a properly fitted and well-designed backpack. I've interviewed many pack designers, and they all tell me that it's the structure of the hip belt that makes a load carry comfortably. Weight from the frame transfers right to the hips, so it's imperative that the belt be well-built.
True story: I took some friends backpacking and found out 4 miles into the hike that one of them had a broken buckle on their hip belt, so she wasn’t even using it. She was VERY uncomfortable but didn’t say a word about it because she figured “that was backpacking.” Please don’t blindly accept that backpacking hurts.
Shoulder Harness: The shoulder harness is designed to stabilize the lateral movement of your backpack and is NOT for bearing the load of a pack. In general, you don’t want the shoulder straps to be so tight that they’re uncomfortable, and you certainly don’t want all the weight of the pack bearing down on them. Just get them snug to secure the load and enjoy the ride.
Sternum Strap: The sternum strap connects your two shoulder straps together and runs across your chest (not too high, not too low). This strap also helps to stabilize the load and prevents your shoulders from spreading apart. This allows your arms to move freely while hiking. You want it snug enough to work but not too tight that it’s uncomfortable. Start with it loose and slowly tighten until it feels like it’s taking the pressure off your shoulders. Remember, it’s a backpack, not a racing harness.
Load Lifters: Load lifters are responsible for correctly positioning the weight of your pack by bringing the top of the frame toward your center of gravity to prevent the load from pulling you backward. They look like a piece of lashing running from the top of your frame to your shoulder straps and should be pulled snugly to a 45-degree angle. Not all load lifters are created equal. Ultralight packs may have them, but they’re often not functional because of the minimalistic frame design or lack thereof.
To be functional, the pack frame needs to come up above the shoulders to create that 45-degree angle. No angle, no lift. All packs designed for load hauling will have proper load lifters, and they make a world of difference when implemented.
Compression Straps: Finally, your pack's compression straps run between the pack frame and the front of the pack bag and, when pulled tight, help secure the load to the frame. Depending on how loaded your pack is, they will help take the slop out of the bag and make everything nice and tight. You’d be surprised at how much better a load can feel when compression straps are pulled tight. The load is more stable, more secure, and rides much closer to your back, where the frame is.
Backpack Suspension Types and Sizing
Now that you have a solid understanding of the parts of a backpack and their functions, let's dive into suspension types. These are designed to support the load and distribute weight evenly across your body to make carrying your gear more comfortable. It includes shoulder straps, hip belts, and load lifters - they’re either fixed or adjustable for a custom fit.
Adjustable Suspensions: These allow you to adjust the placement of the shoulder straps and the size of the waist belt for different body types. They often come in sizes like Small, Medium, and Large. Some even have parts that can be swapped out for mixed sizes. Maybe you're tall and skinny, so you need a long torso size but a small belt size. Adjustable suspensions are great for dialing in the perfect fit.
Fixed Suspensions: These have NO ability to be adjusted. They have fixed placement for the shoulder straps and waist belts, meaning they either fit or they don’t (S, M, L). You can’t move the shoulder straps up and down based on torso size, and you can’t swap the belt out for a different size. This helps to reduce the overall weight of a pack, making them popular among long-distance hikers, but they may not be as customizable for comfort. When they work, they work great, but when they don't, it's can be very uncomfortable.
Your backpack is either adjustable or fixed, and depending on which one it is, your options may be many or very limited. If you’re not sure, check look at the stitching of the pack. If it’s sewn into place and unable to be moved, then you have a fixed suspension. If, on the other hand, you have velcro attachments or something that allows that harness to slide up and down or the waistbelt to be changed out, you have an adjustable suspension. You can also just Google your backpack type to find out.
How to Pack Your Backpack
Knowing the anatomy of your backpack and the type of suspension it has is only a third of the story. How you load your gear into your backpack is the next third and has a big impact on how it feels when you’re wearing it. On more than one occasion, I've been backpacking with someone who had no idea how to pack their backpack and by offering just a few tips, we were able to improve their overall comfort.
The name of the game is “Weight Distribution.” Get it right, and your pack will feel centered on your back, balanced, and comfortable. Get it wrong, and your shoulders will ache, your neck will hurt, and you’ll feel like you’re hauling around a soggy bowling ball filled with despair. Think back to the anatomy of your backpack. Every piece works together to carry the load. We want to make your pack work FOR you, not against you.
Here’s how to pack your backpack so it can function how it’s intended to.
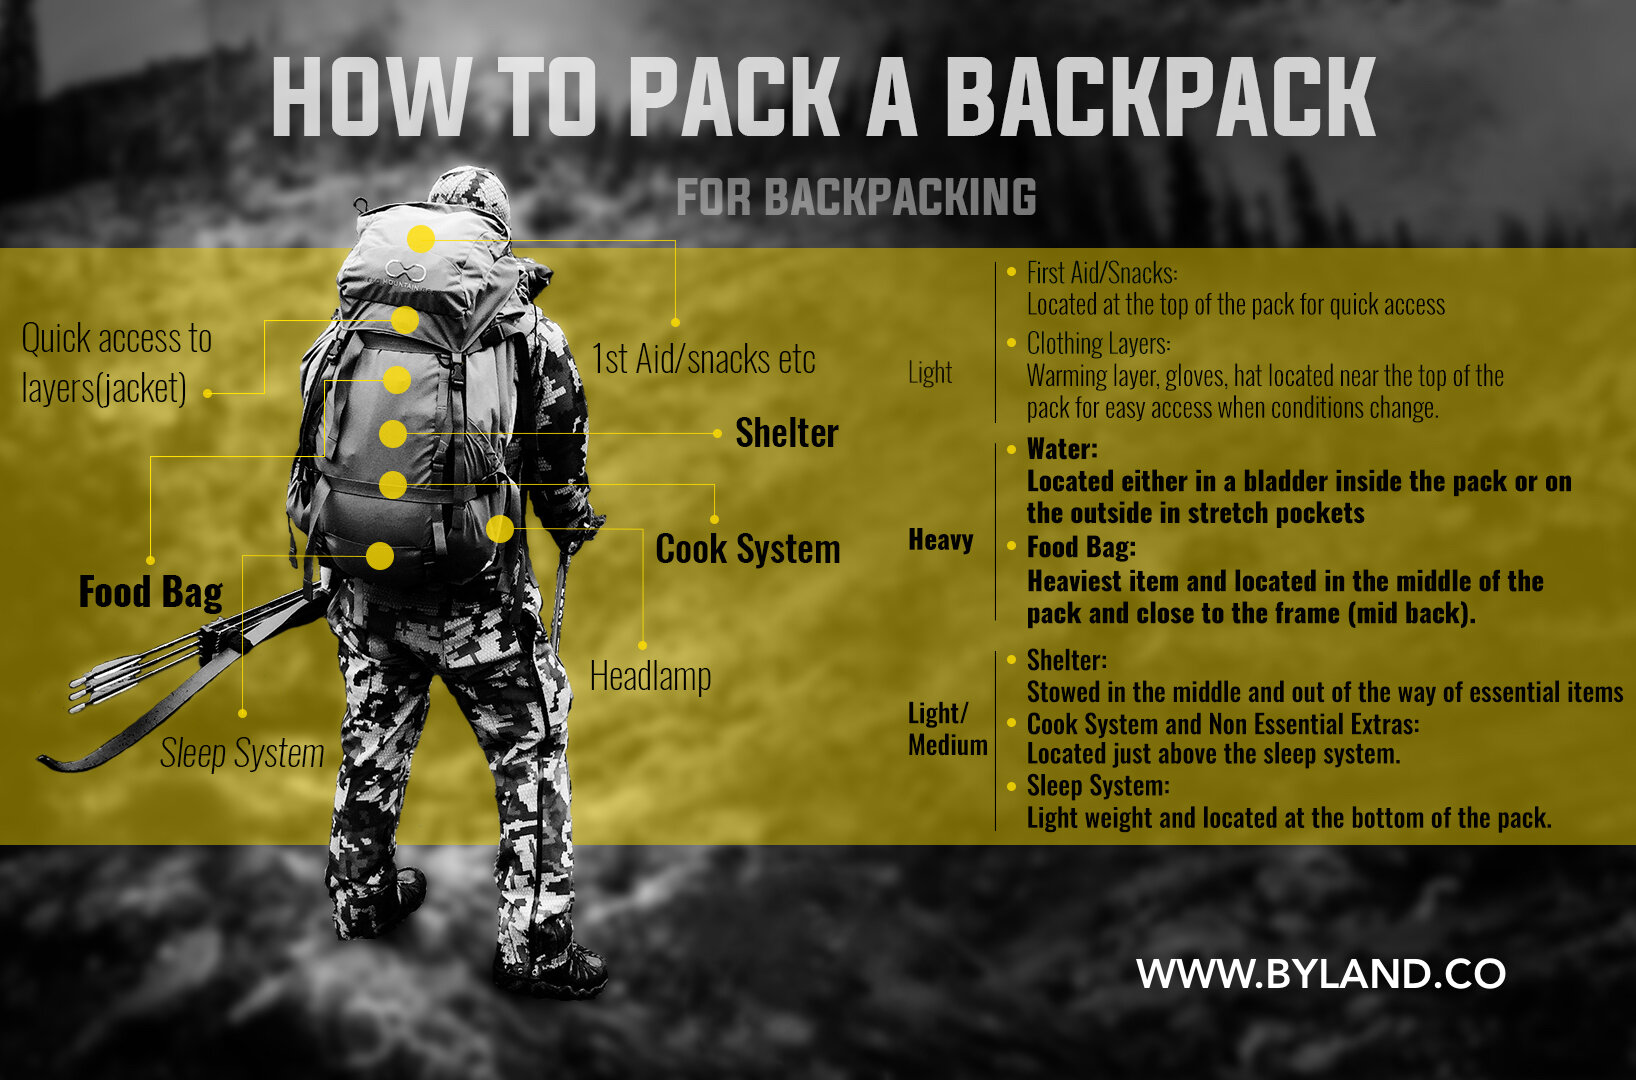
Locate the heaviest objects as near to the upper middle part of the pack and as close to your body (pack frame) as possible.
It's not an exact science, but the idea here is to prevent the pack from sagging down or being too top-heavy. The middle of the pack is like your center of gravity. By keeping your heaviest items around the area of your shoulder blades when wearing your pack, you won't get that feeling of your pack sagging down around your butt. On the flip side, keeping those heavy bits of gear below your shoulder line will prevent your pack from feeling top-heavy. For most people, your food bag is likely the heaviest piece of gear, but it could also be something like a cook stove, extra water, or tent. Again, it’s not an exact science. Just figure out what weighs the most from your pack and try to locate it toward the middle/top of your pack. Stow the lightest items like a sleeping bag and extra clothing items for the bottom and top.
Pack what you don't need access to at the bottom of your bag.
When it comes to efficiency and load carry, pack in reverse. You don't need your sleeping bag until you're ready to camp, right? Put that thing at the bottom along with your sleeping pad. Locate warming layers at the top because you may want access to them throughout the day. Pull some snacks out and put them at the top, but leave the bulk of the food in the middle of the pack.
Distribute the load evenly, left to right.
Try not to have the left side of your pack be heavier than the right. By distributing the weight evenly across the pack, you'll spread the weight evenly across your shoulders and hips and won't get hot spots or aches. One way to easily tell if your pack is lopsided is to set it down and see which way it leans or falls over. That’ll give you a good idea of where to start.
Avoid Leverage Points
Place all heavy objects as close to the pack frame as you can and lighter objects further away. For example, stuffing your puffy jacket or a mid-layer around a heavy food bag will make the pack ride far better than doing so in reverse. Heavy objects placed away from the pack frame will make you feel as if something is pulling you backward.
Tighten everything up!
Most backpacks come with some kind of compression straps. Once you’re packed and ready to put your backpack on, pull those straps as tight as possible to help secure it to the pack frame. It will further stabilize your load and improve your balance. Compression straps essentially help keep the load close to your body's center of gravity. If you need an example of how this applies, toss a bunch of heavy stuff into a duffle bag and carry it around with it loose. Now, find some straps you can tighten the load up with and do the same. I bet you'll see a difference. The same thing applies to your pack.
Proper Backpack Weight Distribution
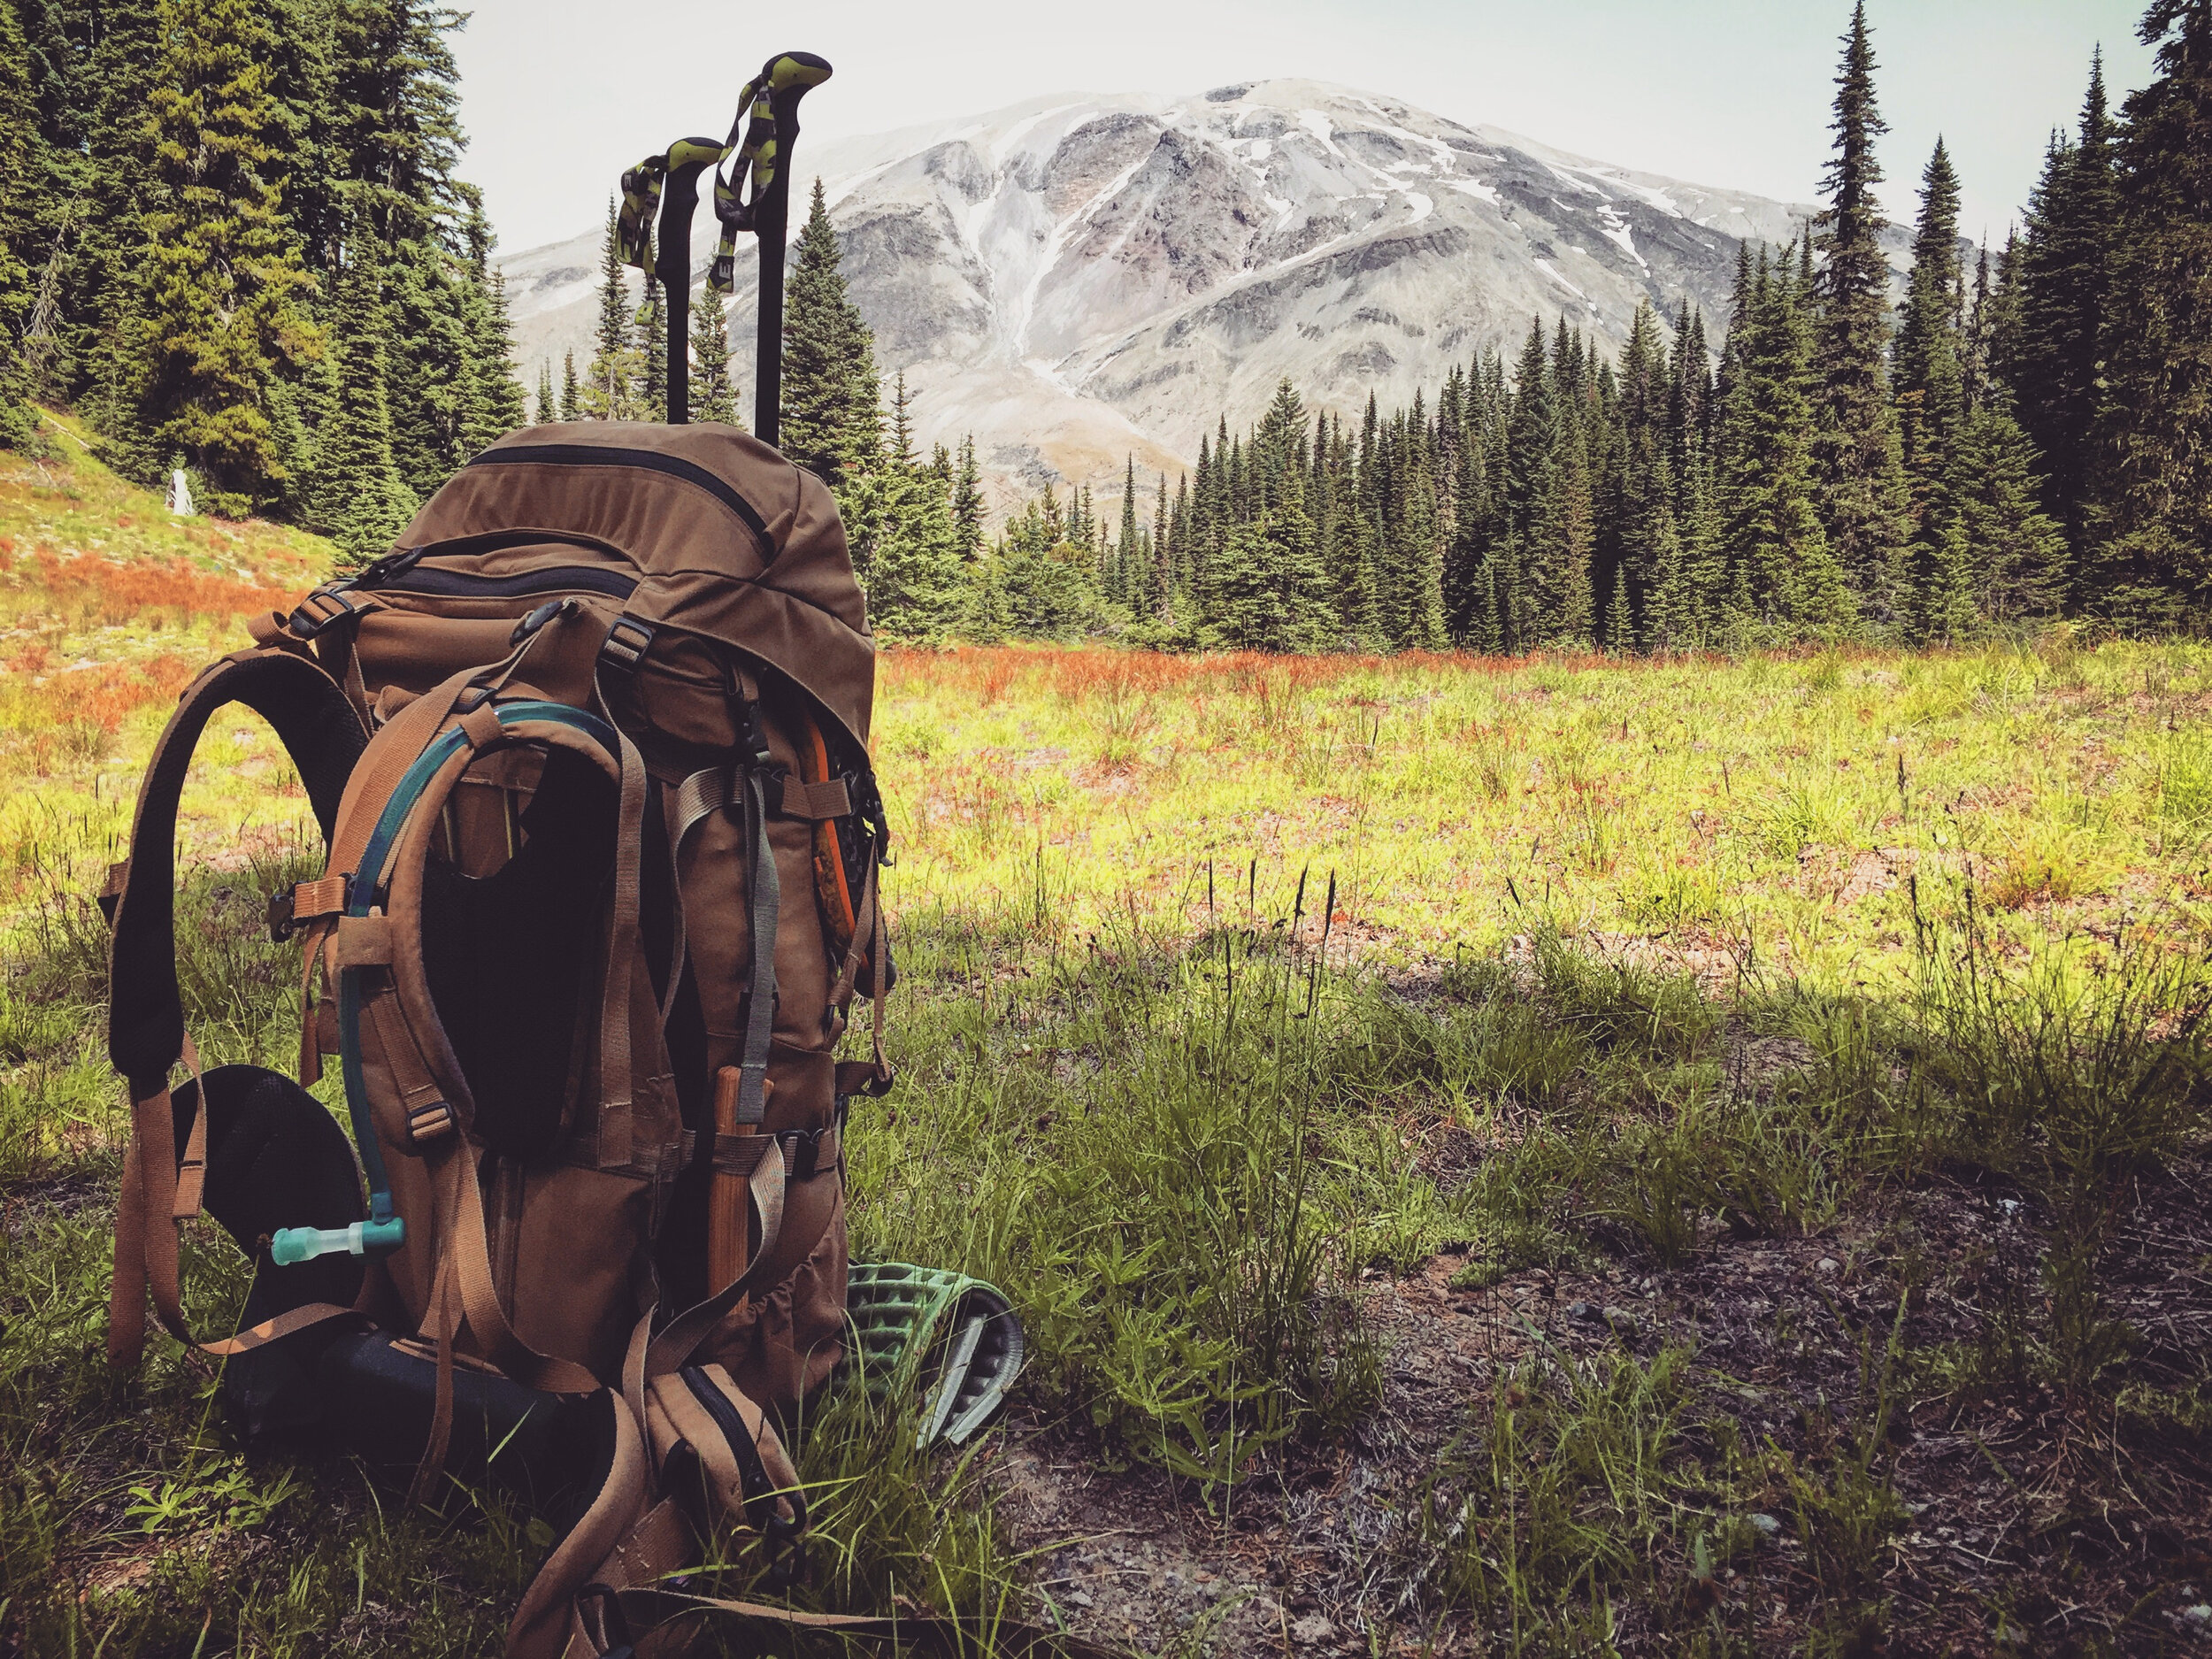
IMPORTANT NOTE: Do NOT place random pieces of gear on the outside of your backpack. It might make sense at first or even look cool, but it’s not a good practice and the easiest way to damage gear. The bag of your pack is designed to protect gear, so if you can’t fit it all in there, consider getting a new bag. Additionally, gear flopping on the outside makes for an awkward load while hiking. The frame can’t work for you if your sleeping bag is dangling about unsecured.
How to Wear Your Backpack
And now, your final step! Wearing your backpack the wrong way makes for a tough time on the trail, but in just a few easy steps, you can go from uncomfortable to comfortable.
Note: I highly suggest you refer to the instructions of the company who made your pack for how they want you to fit it. Different packs have slightly different methods for achieving the perfect fit, so get with the maker to learn how they suggest you wear their product.
WARNING!! Always adjust your pack with a load in it. Making adjustments to and fitting an empty backpack is like drinking decaf coffee - pointless.
Pull tight compression straps: This keeps the load tight to the frame.
Loosen the belt, sternum, load lifters, and shoulder straps: This ensures you get dialed in for the load you’re about to haul (every load is different).
Buckle the Hip Belt: Sling the pack on, lean forward slightly to keep the pack high on your hips, and buckle the hip belt. Make sure the lumbar pad is in the proper position on your lower back (not on your butt), and tighten it down snugly so it won't slip. The hip belt should sit comfortably on your hip bones and wrap around them.
Adjust Shoulder Straps: Pull the shoulder straps down until they’re snug. Think “finger tight”—you don’t want them to be overly tight and bearing too much of the weight.
Connect the Sternum Strap: Stand up and connect the sternum strap. Slowly tighten it to a comfortable position. It should be snug but not restrict your breathing.
Adjust Load Lifters: Reach back, grab the load lifters and slowly pull forward until the strap angle is near 45 degrees. You should feel the load lift up and center itself.
This should get you 99% of the way there. If something feels off, repeat the process until it's right.

More Troubleshooting Steps
If you’ve done everything I’ve mentioned then you’re probably good to go, but if not, here are a few more bits of advice to help smooth out that ride:
Avoid Overloading Your Pack Frame:
Every backpack has a maximum load rating for which it’s designed. Go over that limit and the design becomes compromised. No matter what you do, the pack will feel uncomfortable. Stay well below that recommended load rating.
Reduce Waistband Bulk:
Avoid wearing a bulky belt or pants with a strange waistline that may interfere with the hip belt when you pull it tight. I personally wear running shorts when I’m backpacking unless I’m hunting.
Reduce Pack Weight:
Aside from risking your pack being overloaded, a heavy pack sucks to wear, so the more you can do to leave excess gear at home, the better off you are. The biggest culprits are the “what if” items you take with you because you’re afraid of not having them. Be selective and bring only what you need for the trip. If there’s one thing that will drastically improve your comfort, it’s your overall pack weight.
Ventilate Your Back:
If you tend to overheat, find a backpack that breathes well and try to avoid wearing too many layers. A well-ventilated back can make a big difference in overall comfort.
Invest In Gear:
Sometimes you just have a dud of a pack or gear that won’t pack down small, weighs too much, or just doesn’t work for what you’re doing. Make a concerted effort to slowly improve your kit over time. Think of it as an investment in yourself. The better the gear, the better the time, and the more you’ll go.
Real-Life Examples
If you need some encouragement, here are some real-world stories of how I’ve helped people in the past improve their ride.
The Painful Pack Adjustment: A friend of mine had a backpack that he accepted as being painful. This also meant he accepted backpacking as being painful too. He figured all packs were the same and pain was just part of the territory. He only ever needed to hike a couple of miles to get to a fishing hole, but those couple miles were always a bad experience. After asking a few questions about the pack, I discovered it had an adjustable suspension that had been set to the shortest possible torso length. This guy is 6'2" and wearing a pack that was configured for someone more like me at 5'8"! One quick adjustment to the torso length and his mind was blown. For years, he'd been hauling 50 lbs of gear in a pack adjusted for someone much shorter, meaning all the weight was on his shoulders, not his hips. Now, he’s excited to try out the pack that he was beginning to hate. #winning
Lopsided Packing Problems: A number of summers ago, I was on a hike with some friends who were new to backpacking. One of them had packed their back in a"make it fit" fashion, meaning it was lopsided and had items hanging out everywhere. I didn't want to be "that guy" offering unsolicited advice, so I waited until the next morning when we packed up to offer some advice. I suggested they try packing in a more thoughtful way and avoid any loose gear flopping about on the outside. Later that day, I checked in to see how it was going, and I was greeted with smiles. The pack felt lighter, more stable, and much more comfortable.
The Wrong Pack for the Job: I once had a pack that just didn’t seem to fit my body the right way and no amount of adjusting or organizing could fix the issue. After switching to a pack that better suited my body, I was amazed at how much more comfortable the same amount of gear felt simply due to a better fitting pack. Sometimes, it really is about finding the right match for your body, but before it gets to that, there's a lot of work we can do.
Final Thoughts: Never Settle For a Painful Pack
The big takeaway here is that backpacking should not be uncomfortable. Who wants to spend an entire weekend in the backcountry thinking about how much their backpack hurts? No one! If it does, then use the steps I’ve outlined in this post to fix the issue.
If, for some reason, you do everything right and it’s still not comfortable, then maybe it’s time to shop for a new backpack. Sometimes, packs just don’t work for certain body types and that’s okay. That’s why there are so many of them out there! Find one that works for you, dial in the fit, and get back to having fun.
Ready to make every hike more enjoyable?
If these tips were helpful, feel free to share this guide with others and subscribe to the mailing list for more practical advice to make the most of your time outdoors. If you’re new to backpacking and want to take your backpacking skills up a notch, check out my beginner backpacking course, where I cover everything from gear selection to getting the perfect fit—so every adventure is a comfortable one. Let’s make your next trip the best yet!
Emory, By Land
Thanks for stopping by! If you have any questions for me or want to connect, you can leave a comment or email me at emory@byland.co.
Looking For More Great Articles?


Curious about barefoot running and how it ties into living a more balanced, fulfilling life? In this episode, Barefoot Ted, the founder of Luna Sandals, to explore the power of minimalism, autonomy, and finding your flow. Ted shares his unique perspective on the three pillars of well-being and how embracing simplicity—both on the trail and in life—can lead to something pretty special.